
Keyless entry remotes are a fantastic convenience, allowing you to lock, unlock, and even start your car with the push of a button. But what happens when you need a replacement, or want to add an extra remote? This is where Aftermarket Car Remote Programming comes in. Understanding how aftermarket remotes work and how to program them is crucial for any car owner looking for a cost-effective and convenient solution.
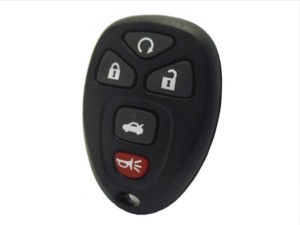 Aftermarket Keyless Entry Remote
Understanding Aftermarket Car Remotes
Aftermarket car remotes, also known as key fobs or keyless entry transmitters, are replacement or additional remotes that are not obtained directly from your car’s manufacturer. They are designed to be compatible with a wide range of vehicle makes and models, offering a versatile and often more affordable alternative to dealership remotes.
These remotes function similarly to original equipment manufacturer (OEM) remotes. They communicate with your car’s receiver using radio frequencies (RF) and digital encryption, typically operating on frequencies like 315 MHz and 433 MHz. Each aftermarket key fob contains a unique identification code. When you press a button, this code is transmitted as an RF signal. Your vehicle’s receiver then verifies this code against the stored codes in its memory before executing the requested action, such as locking or unlocking doors.
Choosing an aftermarket remote can be a smart move for several reasons:
- Cost Savings: Aftermarket remotes are generally less expensive than dealership replacements.
- Availability: They are readily available online and at auto parts stores.
- Variety: A wide selection of styles and features are available, sometimes exceeding OEM options.
However, it’s crucial to choose a reputable brand and ensure compatibility with your specific vehicle to guarantee proper functionality and security.
Types of Aftermarket Car Remote Programming
Programming an aftermarket car remote to work with your vehicle involves pairing its unique code with your car’s receiver. There are several methods to achieve this, and the best approach depends on your car’s make, model, and year. Here are the common types of aftermarket car remote programming:
- Self-Programming (DIY): Many vehicles, particularly older models, allow for self-programming. This method involves a specific sequence of actions performed inside your car, often without needing special tools. It might include turning the ignition on and off, pressing specific buttons, and opening/closing doors in a timed manner. The exact procedure is vehicle-specific and should be detailed in your owner’s manual or a reliable online resource.
- Onboard Programming via Vehicle Menu: Some newer vehicles offer an onboard programming mode accessible through the car’s infotainment system or dashboard controls. This user-friendly method typically involves navigating menus, entering a security code (if required), and following on-screen prompts to synchronize the new aftermarket remote.
- Professional Programming (Locksmith or Dealership): For many modern vehicles, especially those with advanced security systems, professional programming is necessary. Automotive locksmiths and dealerships possess specialized diagnostic tools and software to access your car’s computer system and program aftermarket remotes. While this involves a cost, it ensures correct programming and compatibility, particularly for complex systems.
- Cloning Service: If you have an existing working remote, some services can clone its signal onto a new aftermarket remote. This creates a direct duplicate with the same identification code, eliminating the need for vehicle programming in some cases. However, cloning might not be feasible for all vehicles and security systems.
Step-by-Step Guide to DIY Aftermarket Remote Programming
If your vehicle supports self-programming, you can potentially program your aftermarket car remote at home. While the precise steps vary, here’s a general guide to follow. Always consult your vehicle’s owner’s manual or a vehicle-specific programming guide for accurate instructions for your car’s make, model, and year.
- Gather Your Remotes: Collect all aftermarket remotes you intend to program, as well as any existing working remotes. The programming process often clears previously programmed remotes, so you’ll need to reprogram them all.
- Enter Your Vehicle: Get inside your car and ensure all doors are fully closed.
- Ignition Key Insertion: Insert your key into the ignition switch.
- Cycle Ignition (On/Off): Turn the ignition key to the “On” position (without starting the engine) and then back to the “Off” position. Repeat this cycle a specific number of times within a defined timeframe (e.g., three times within five seconds). The exact number of cycles and timing are crucial and vehicle-dependent.
- Enter Programming Mode: If the ignition cycling is performed correctly, your vehicle should enter programming mode. This is often indicated by the door locks cycling (locking and unlocking automatically) or an audible chime.
- Activate Aftermarket Remote: Within the specified timeframe (usually 10-30 seconds after entering programming mode), press any button on the aftermarket remote you wish to program. The vehicle may respond with door lock cycling, flashing lights, or a chime to confirm successful programming.
- Program Additional Remotes: If you have more aftermarket remotes to program, repeat step 6 for each remote within the allowed timeframe.
After completing these steps, start your car’s engine, turn it off, and test all programmed aftermarket remotes to verify they are functioning correctly. It’s important to note that self-programming can be sensitive to timing and procedure, so you might need to repeat the process a few times to achieve success.
Tips and Best Practices for Aftermarket Remote Programming
To increase your chances of successful aftermarket car remote programming, especially when self-programming, consider these best practices:
- Fresh Battery: Install a new, high-quality battery in your aftermarket remote before starting the programming process. A weak battery can hinder programming.
- Have All Remotes Ready: Ensure all remotes you intend to use are available before beginning the procedure.
- Minimize Interference: Keep electronic devices away from the vehicle during programming to reduce potential signal interference.
- Verify Compatibility: Double-check that the aftermarket remote is specifically designed and compatible with your vehicle’s make, model, and year. Look for remotes with the correct FCC ID or part number if specified for your car.
- Consult Reliable Resources: Always rely on your vehicle’s owner’s manual or reputable online databases for vehicle-specific programming instructions. Avoid generic or unreliable sources.
Troubleshooting Common Aftermarket Remote Programming Issues
Even with careful execution, aftermarket remote programming can sometimes encounter issues. Here are common problems and troubleshooting steps:
- Remote Not Responding: If the aftermarket remote doesn’t respond during programming, first verify that the part number or FCC ID (if applicable) matches your original remote or vehicle requirements. Incompatibility is a frequent cause of failure.
- Check Battery: Ensure the battery in the aftermarket remote is new and correctly installed. A weak battery is a common culprit.
- Poor Battery Connections: If using a second-hand or older aftermarket remote, inspect the battery terminals for corrosion or poor contact. Clean terminals if necessary.
- Incorrect Procedure: Programming procedures are very specific. Double-check you are following the exact steps for your vehicle, paying close attention to timing and sequences.
- Vehicle Not Entering Programming Mode: If your car doesn’t seem to enter programming mode (no lock cycling or chime), retry the ignition cycling sequence meticulously. If it consistently fails, self-programming might not be supported for your vehicle, or there might be an underlying issue with your car’s receiver system.
When to Seek Professional Help for Aftermarket Remotes
While DIY programming is possible for some aftermarket car remotes, there are situations where professional assistance is necessary or highly recommended:
- No Self-Programming Procedure: If you cannot find a reliable self-programming procedure for your vehicle, or if attempts are consistently unsuccessful.
- Complex Security Systems: Many modern vehicles with advanced anti-theft systems require specialized diagnostic tools and expertise for remote programming.
- Lost All Remotes: If you have lost all your original remotes, programming new aftermarket remotes often requires professional equipment to bypass security measures.
- Persistent Programming Issues: If you’ve tried troubleshooting and still cannot program your aftermarket remote, a professional locksmith or dealership technician can diagnose and resolve the issue.
Locksmiths specializing in automotive services and dealerships have the necessary tools and knowledge to program aftermarket remotes for a wide range of vehicles. They can ensure correct programming, address potential technical issues, and provide reliable solutions when DIY methods are insufficient.
For purchasing new aftermarket keyless entry remotes compatible with your car, consider checking reputable online retailers or your local auto parts stores for a wide selection and expert advice.
FAQ/People Also Ask
How do I program an aftermarket keyless entry remote for my car?
To program an aftermarket keyless entry remote, first check if your vehicle supports self-programming. Consult your owner’s manual for the specific procedure. If self-programming is not possible or fails, seek professional help from a locksmith or dealership.
Can I program an aftermarket keyless entry remote myself, or do I always need professional help?
It depends on your vehicle. Many older vehicles allow self-programming of aftermarket remotes. Newer, more complex vehicles often require professional programming services.
What if my aftermarket keyless entry remote doesn’t work after programming?
If your aftermarket remote is not working after programming, troubleshoot by checking the battery, verifying compatibility, and re-checking the programming steps. If issues persist, professional assistance is recommended.
Are special tools needed for aftermarket keyless entry remote programming?
Special tools are generally required for professional programming by locksmiths or dealerships. Self-programming typically does not need extra tools.
Can I program multiple aftermarket keyless entry remotes for one vehicle?
Yes, most vehicles allow programming multiple aftermarket keyless entry remotes. Follow the programming procedure for each remote you wish to add.
How long does aftermarket remote programming usually take?
Self-programming usually takes only a few minutes. Professional programming time can vary but is typically also relatively quick.
What if I lose the programming instructions for my aftermarket remote?
If you lose instructions, refer to your vehicle’s owner’s manual, search online for vehicle-specific guides, or contact the remote manufacturer or seller for support.
Can I program a used aftermarket keyless entry remote for my car?
Programming a used aftermarket remote is possible in some cases, but compatibility and prior programming history of the used remote can be factors. It’s generally recommended to use new, compatible aftermarket remotes for best results.