
Computer graphics offers a fascinating way to bring images to life on screen. With simple programming techniques, you can create dynamic animations, even something as engaging as an animated moving car. This tutorial will guide you through the process of building a basic Animated Moving Car Program using the graphics.h library in C/C++. This library provides fundamental functions for drawing shapes and controlling the display, making it perfect for learning the basics of computer animation.
Understanding graphics.h for Animation
The graphics.h header file is a crucial component for graphics programming in C and C++, particularly in environments like Turbo C++. It provides a set of functions that allow you to directly manipulate the graphics display, drawing shapes, lines, and text. For creating an animated moving car program, we will leverage functions within this library to draw the car and simulate movement.
Here are some essential functions from graphics.h we’ll use:
initgraph(&gd, &gm, ""): This function initializes the graphics system.gdstands for graphics driver, andgmis graphics mode.DETECTcan be used forgdto automatically detect the best driver, andgmcan also be set to a default mode.line(x1, y1, x2, y2): As the name suggests, this function draws a line. You specify the starting coordinates(x1, y1)and the ending coordinates(x2, y2)to create a line segment. For our animated moving car program, we’ll use lines to construct the car’s body.circle(x, y, r): This function draws a circle.(x, y)defines the coordinates of the circle’s center, andris the radius. We will use circles to create the wheels of our animated car.setcolor(color): This function sets the current drawing color.graphics.hprovides predefined color constants likeRED,BLUE,GREEN,BLACK,WHITE, etc. We’ll usesetcolor()to give our animated car a vibrant appearance.delay(milliseconds): Animation is about creating the illusion of motion by rapidly displaying a sequence of slightly different images. Thedelay()function pauses the program execution for a specified number of milliseconds. This creates the timing necessary for our eyes to perceive movement in the animated moving car program.cleardevice(): This function clears the entire graphics screen. It’s useful for creating a clean frame for each step of the animation, especially when you want to show the car moving across a clear background.getch(): This function waits for a key press before the program exits, allowing you to see the final frame of your animation before the graphics window closes.closegraph(): This function deallocates all memory allocated by the graphics system and restores the screen to text mode. It’s important to call this at the end of your graphics program.
Example 1: Animated Moving Car Program without cleardevice()
This first example demonstrates a simple approach to creating an animated moving car program where we don’t use cleardevice(). Instead, we redraw the car in black color at its previous position to create the effect of erasing it before drawing it at a new location.
// C++ program to draw an animated moving car.
// This program should be run in a compiler with graphics.h library installed
#include <graphics.h>
#include <stdio.h>

// Function to draw animated moving car
void draw_moving_car(void) {
    int i, j = 0, gd = DETECT, gm;
    // Initialize graphics mode
    initgraph(&gd, &gm, "");

    for (i = 0; i <= 420; i = i + 10) {
        // Set color of car as red
        setcolor(RED);

        // Lines for bonnet and body of car
        line(0 + i, 300, 210 + i, 300);
        line(50 + i, 300, 75 + i, 270);
        line(75 + i, 270, 150 + i, 270);
        line(150 + i, 270, 165 + i, 300);
        line(0 + i, 300, 0 + i, 330);
        line(210 + i, 300, 210 + i, 330);

        // For left wheel of car
        circle(65 + i, 330, 15);
        circle(65 + i, 330, 2);

        // For right wheel of car
        circle(145 + i, 330, 15);
        circle(145 + i, 330, 2);

        // Line left of left wheel
        line(0 + i, 330, 50 + i, 330);

        // Line middle of both wheel
        line(80 + i, 330, 130 + i, 330);

        // Line right of right wheel
        line(210 + i, 330, 160 + i, 330);

        delay(100);

        // To erase previous drawn car, draw
        // the whole car at same position
        // but color using black
        setcolor(BLACK);

        // Lines for bonnet and body of car (redrawn in black to erase)
        line(0 + i, 300, 210 + i, 300);
        line(50 + i, 300, 75 + i, 270);
        line(75 + i, 270, 150 + i, 270);
        line(150 + i, 270, 165 + i, 300);
        line(0 + i, 300, 0 + i, 330);
        line(210 + i, 300, 210 + i, 330);

        // For left wheel of car (redrawn in black to erase)
        circle(65 + i, 330, 15);
        circle(65 + i, 330, 2);

        // For right wheel of car (redrawn in black to erase)
        circle(145 + i, 330, 15);
        circle(145 + i, 330, 2);

        // Line left of left wheel (redrawn in black to erase)
        line(0 + i, 330, 50 + i, 330);

        // Line middle of both wheel (redrawn in black to erase)
        line(80 + i, 330, 130 + i, 330);

        // Line right of right wheel (redrawn in black to erase)
        line(210 + i, 330, 160 + i, 330);
    }

    getch();
    closegraph();
}

// Driver code
int main() {
    draw_moving_car();
    return 0;
}
Explanation:
This code initializes the graphics mode and then enters a for loop that iterates to create the animation frames. In each iteration:
- Draw the car: The code uses
line()andcircle()functions to draw the car’s body and wheels in red color usingsetcolor(RED). Theivariable in the coordinates controls the horizontal position of the car, making it move across the screen asiincreases. - Introduce a delay:
delay(100)pauses the execution for 100 milliseconds, controlling the speed of the animation. - Erase the previous car: To create the illusion of movement, the car needs to be erased from its previous position. This is done by redrawing the exact same car shape but in
BLACKcolor usingsetcolor(BLACK). This effectively makes the previous car disappear into the black background (assuming the background color is black, which is often the default).
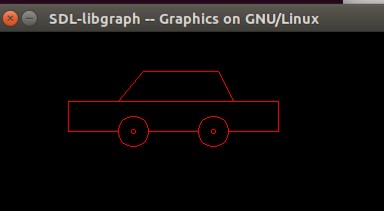
Here’s what the output looks like:
Notice that in this example, because we are not clearing the screen, you might see a trail of the car being drawn as it moves. This is because we are drawing the car in black over its previous position, but due to slight delays or screen refresh, the “erasing” might not be perfectly clean, especially on faster systems.
Example 2: Animated Moving Car Program with cleardevice()
For a cleaner animation in our animated moving car program, we can use the cleardevice() function. This function clears the entire screen to the current background color before drawing each frame, ensuring that only the car in its new position is visible.
// C program to draw an animated moving car.
// This program should be run in a compiler with graphics.h library installed
#include <graphics.h>
#include <stdio.h>

// Function to draw animated moving car
void draw_moving_car(void) {
    int i, j = 0, gd = DETECT, gm;
    // Initialize graphics mode
    initgraph(&gd, &gm, "");

    for (i = 0; i <= 420; i = i + 10) {
        // Set color of car as red
        setcolor(RED);

        // Lines for bonnet and body of car
        line(0 + i, 300, 210 + i, 300);
        line(50 + i, 300, 75 + i, 270);
        line(75 + i, 270, 150 + i, 270);
        line(150 + i, 270, 165 + i, 300);
        line(0 + i, 300, 0 + i, 330);
        line(210 + i, 300, 210 + i, 330);

        // For left wheel of car
        circle(65 + i, 330, 15);
        circle(65 + i, 330, 2);

        // For right wheel of car
        circle(145 + i, 330, 15);
        circle(145 + i, 330, 2);

        // Line left of left wheel
        line(0 + i, 330, 50 + i, 330);

        // Line middle of both wheel
        line(80 + i, 330, 130 + i, 330);

        // Line right of right wheel
        line(210 + i, 330, 160 + i, 330);

        delay(100);

        // To erase previous drawn car
        // use cleardevice() function
        cleardevice();
    }

    getch();
    closegraph();
}

// Driver code
int main() {
    draw_moving_car();
    return 0;
}
Explanation of changes:
The core drawing logic remains the same as in Example 1. The key difference is the replacement of the “erase by redrawing in black” section with a single line:
cleardevice();Now, in each iteration of the loop:
- Draw the car (Red): The car is drawn in red at its new position.
- Introduce a delay:
delay(100)pauses the animation. - Clear the screen:
cleardevice()wipes the entire graphics screen to black, effectively removing the car from its previous position before the next frame is drawn.
The output of this example is visually similar to the first example in terms of the car’s movement, but it will be cleaner without the potential trail effect:
Conclusion
This tutorial has shown you the fundamental steps to create an animated moving car program using the graphics.h library. You learned how to use basic drawing functions like line() and circle(), control color with setcolor(), manage animation speed with delay(), and clear the screen using cleardevice().
Experiment with these examples! Try changing the car’s design, color, speed, or even add more elements to the animation. This basic animated moving car program is a stepping stone to more complex and creative computer graphics projects. As you become more comfortable with these fundamental concepts, you can explore more advanced graphics techniques and create even more impressive animations.