
Embarking on DIY robotics projects is an exciting way to learn about electronics and programming. If you have an Arduino board and a few servos, creating a mini obstacle-avoiding car is a fantastic starting point. This project is not only beginner-friendly but also highly rewarding as you witness your robot car navigate its surroundings autonomously. Using readily available components and a bit of creative coding, you can bring this fun project to life. Let’s dive into the world of Arduino Car Servo Programming and build our own little robot!
Understanding the Servos for Arduino Car Projects
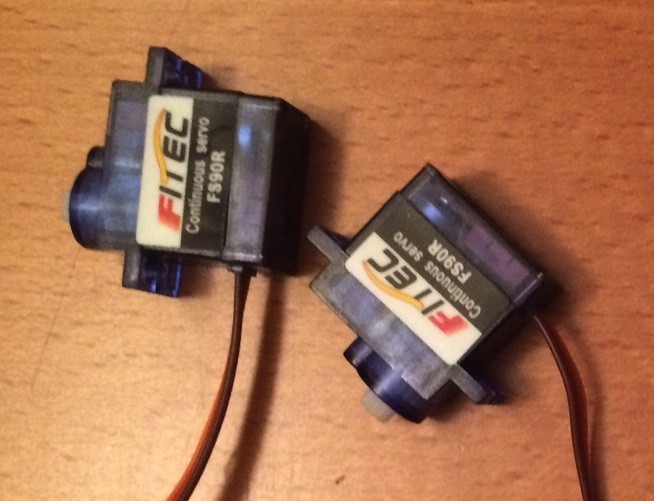
For this project, we’ll utilize continuous rotation servos. Unlike standard servos that move to a specific angle, continuous rotation servos allow for full 360-degree rotation, functioning more like gear motors. Controlling these servos with Arduino involves adjusting the voltage to manage their speed and direction, making them perfect for driving our robot car.
Initially, Lego wheels might seem convenient, but their grip can be insufficient on smooth surfaces. Upgrading to rubber wheels designed to fit FS90R servos enhances traction and overall performance of your Arduino car.
To seamlessly integrate the servos with Lego structures, a practical approach is to glue a 2×3 Lego plate to each servo. This simple modification allows for easy attachment and detachment of servos to your Lego car chassis, providing flexibility during construction and modifications.
Essential Components for Your Arduino Robot Car
The brain of our operation is an Arduino UNO, a popular microcontroller board ideal for beginners and hobbyists. To drive the servos efficiently, we incorporate an Adafruit motor shield. This shield simplifies the process of controlling motors and servos with Arduino by providing dedicated terminals and power management.
For obstacle detection, the car is equipped with an SR-04 ultrasonic sensor. This sensor emits sound waves and measures the time it takes for the echo to return, calculating the distance to objects in its path. Attaching the sensor to a Lego brick allows for easy mounting at the front of the car, acting as its “eyes”.
A simple pushbutton acts as an on/off switch for the car’s movement. Utilizing a basic button circuit with a resistor enables us to detect button presses through one of Arduino’s digital input pins.
To provide stability, especially with only two driven rear wheels, a steel ball caster is used at the front. This ball caster, housed for free omnidirectional movement, is attached to a 2×4 flat Lego tile, making it Lego-compatible and easy to integrate into the car’s chassis, ensuring smooth and balanced movement.
Assembling the Obstacle-Avoiding Lego Car
Powering the Arduino, motor shield, and servos is a 4×1.5V battery pack. While somewhat bulky, it provides sufficient power for operation and fits neatly into a designated compartment within the Lego car’s rear section.
The final assembly might prioritize functionality over aesthetics, but the satisfaction of a working robot car is undeniable! The car is programmed to detect obstacles and react by reversing and turning left until a clear path is available.
Arduino Code and Servo Programming for Car Movement
Controlling the servos is managed using the Arduino Servo library. When working with continuous rotation servos, the servo.write(value) command translates to speed and direction control as follows:
value = 0: Full speed in one direction. Values from 1 to 89 decrease the speed gradually.value = 180: Full speed in the opposite direction. Values from 179 to 91 reduce speed in this direction.value = 90: Ideally, this should stop the servo. However, fine-tuning might be needed for exact stop values depending on servo variations. For the servos used in this project, the actual stop values were closer to 88 or 89. A value of 90 sometimes resulted in very slow movement.
For accurate distance readings from the SR-04 sensor, the NewPing library is employed. The standard SR-04 sensor can sometimes produce inconsistent readings. NewPing’s ping_median() function enhances reliability by taking multiple readings and returning the median distance, filtering out erratic values.
Below is the complete Arduino code sketch used for this Lego servo car:
// ------------------------------------------
// Sketch for a Lego car with two servos (continuous rotation)
// and an SR04 ultrasonic sensor for obstacle detection
// ------------------------------------------
#include <Servo.h>
#include <NewPing.h>

// --- SR04 Ultrasonic Sensor Setup ---
#define TRIGGER_PIN 6 // Arduino pin for sensor trigger
#define ECHO_PIN 7    // Arduino pin for sensor echo
#define MAX_DISTANCE 100 // Max detection distance (cm)
NewPing sonar(TRIGGER_PIN, ECHO_PIN, MAX_DISTANCE);
unsigned long distance = 0;

// --- On/Off Button Setup ---
#define BUTTON_PIN 8
bool runCar = false;

// --- Servo Setup ---
#define RIGHT_WHEEL_PIN 10
#define LEFT_WHEEL_PIN 9
#define RIGHT_WHEEL_STOP_POSITION 88
#define LEFT_WHEEL_STOP_POSITION 89
Servo rightWheel;
Servo leftWheel;

void setup() {
  pinMode(BUTTON_PIN, INPUT_PULLUP); // Use internal pull-up resistor
  rightWheel.attach(RIGHT_WHEEL_PIN);
  leftWheel.attach(LEFT_WHEEL_PIN);
  Stop(); // Initialize car to stop
  Serial.begin(115200); // Start serial communication for debugging
}

void loop() {
  CheckButton(); // Check if button is pressed to toggle car state
  if (runCar) {
    MeasureDistance(); // Measure distance to obstacles
    OperateCar();    // Control car movement based on distance
  }
  delay(200); // Short delay for loop stability
}

void OperateCar() {
  if (distance > 0 && distance < 20) { // If obstacle detected within 20cm
    BackwardsWithLeftTurn(); // Reverse and turn left
  } else {
    Forward(); // Move forward if path is clear
  }
}

void CheckButton() {
  int buttonState = digitalRead(BUTTON_PIN);
  if (buttonState == LOW) { // Button press detected (pulled LOW with pull-up resistor)
    runCar = !runCar;      // Toggle car run state
    if (!runCar) {
      Stop(); // Stop car if turned off
    }
    delay(500); // Debounce delay
  }
}

void MeasureDistance() {
  int uS = sonar.ping_median(10); // Get median distance over 10 pings
  distance = uS / US_ROUNDTRIP_CM; // Convert microseconds to centimeters
  Serial.print("Distance: ");
  Serial.print(distance);
  Serial.println("cm");
}

void Forward() {
  Serial.println("Forward");
  rightWheel.write(RIGHT_WHEEL_STOP_POSITION - 10); // Move right wheel forward
  leftWheel.write(LEFT_WHEEL_STOP_POSITION + 10);  // Move left wheel forward
}

void BackwardsWithLeftTurn() {
  Serial.println("Backwards with turn");
  rightWheel.write(RIGHT_WHEEL_STOP_POSITION + 10);  // Move right wheel backward
  leftWheel.write(LEFT_WHEEL_STOP_POSITION + 10);   // Move left wheel backward (both backward for turn) - adjust values for turning radius
}

void Stop() {
  Serial.println("Stop");
  rightWheel.write(RIGHT_WHEEL_STOP_POSITION); // Stop right wheel
  leftWheel.write(LEFT_WHEEL_STOP_POSITION);  // Stop left wheel
}
This code provides a basic framework for an obstacle-avoiding car. It can be expanded upon to create more sophisticated behaviors and functionalities. The full project code and further enhancements can be found on https://github.com/LarsBergqvist/ArduinoLegoServoCar.
Drive safely and enjoy your Arduino servo car project!